Thursday, December 16, 2010

Après-shovel: Whiskey-spiked hot chocolate and a clafoutis


Shoveling is far less glamorous than skiing, but for those of us living in colder climes, it is, alas, unavoidable! My coping strategy: reward yourself with good food and drink at the end of it. (No surprises there!) Of course, this isn't always possible: during Snowmageddon last winter, we lost power, so all we had to look forward to après-shoveling were a freezing house and cold sandwiches :(
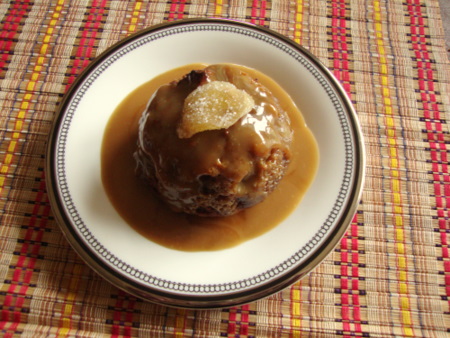
We had our first shovel-worthy snow of the season today, so I resolutely dressed myself in my many layers of gear. Not before inspecting the contents of the fridge, however. It turned out I had a ramekin of clafoutis batter left over from last weekend's dessert, a poached pear clafoutis made to use up, in turn, one orphaned poached pear that I had left over from Thanksgiving. You see how useful it is to cook and bake regularly! Your fridge and pantry are a treasure-trove of supplies that make it easy to whip up something delicious in no time at all. So I dropped a handful of blueberries into the ramekin for good measure and stuck it in the oven. Armed with our cheerful new yellow shovel (last winter's excessive snow busted the old one), I ventured forth bravely outside.

The shoveling wasn't crazy, thankfully, and the newly-acquired Blizzard Wizard seems to be doing its job as well. (That is, after I wrestled the 50-lb bag from the most inaccessible corner of the garage). So all that was left to do was take a hot shower, fix myself some hot chocolate, and dig in to my treat! I normally make hot cocoa, which is a very guilt-free way to enjoy this winter essential, but since I'd officially had two workouts (gym + shoveling) I decided to make real hot chocolate, and add some whiskey to make it even more indulgent. Besides, two squares of chocolate were sitting forlornly in the pantry, and calling my name. Still, I don't like it excessively rich: I prefer to use 2% milk instead of cream. I also drink it unsweetened but you can add sugar to taste.
I don't know if winter will ever be my favorite season, but clearly, it's not without its advantages!

Recipe: Whiskey-spiked hot chocolate (Serves 1)

3/4 cup milk (I use 2% but you can use whole milk, cream or half-and-half)
1 oz. bittersweet chocolate, broken or chopped
1 1/2 tbsp whiskey, or any other spirit of choice (optional)
Brown sugar to taste (optional)
Place the whiskey, if using, in a mug. Heat the milk over medium heat in a small saucepan until steaming. Stir in the chocolate and whisk continuously until melted. Cook for another minute (or more if you want it thicker) and pour into the mug. Add sugar to taste, stir and enjoy!

Friday, November 5, 2010

Happy Diwali!


Today is Diwali, the Indian festival of lights. It's a time when I always miss being back at home in India, where the excitement of Diwali hangs palpably in the air! Firecrackers light up the skies at the crack of dawn and then later on in the evening. The day kicks off to a great start with a South Indian spread for breakfast. The menu may vary but it always includes dosas, delicious rice-and-lentil crepes served with coconut chutney. During the day, we enjoy dressing up in new clothes and visiting the neighbors bearing platters of home-made sweets and savories, and getting more goodies in return! After dark, the city glows with the light of the many rows of lamps that people light outside their homes. It's also the most secular festival in India, when people of all faiths get together to celebrate.
One of the things I crave at this time of year is my mother's signature Diwali sweet, badam puri. This is a delicious confection of her own creation, featuring flaky layers of fried almond pastry soaked in a cardamom-saffron syrup and garnished with vibrant green pistachios. They're definitely a little labor-intensive to make, but my mother, sister and I love to make them as a team, laughing and chattering as we roll, fry, dip and decorate the pastries. Happy Diwali!

Recipe: Amma's Badam Puri (Sugar-dipped Almond Pastry)

Pastry:
1 cup whole almonds, blanched, toasted and ground fine (or use almond flour such as Bob's Red Mill)
1 1/2 cup all-purpose flour
A generous pinch of salt
3 tbs. cold ghee (clarified butter)
1 tsp. baking powder
Ice cold water to make dough
Oil for deep frying
Layering Paste:
3 tbs. rice flour (available from most Indian and some Western grocers)
1 tbs. ghee or clarified butter
2 tsp. thick yoghurt or dahi (like Greek yoghurt)
Syrup:
2 1/2 cup sugar
2 cups water
A few saffron strands, soaked in 2 tbs. warm water
3/4 tsp.ground cardamom
Garnish:
2 tbs finely chopped pistachio nuts
For the dough, pulse the flour, baking powder and salt in a food processor a few times. Add the ghee and pulse a few more times to combine. Drizzle in some ice-cold water, a few tablespoons at a time, to make a dough that is neither too soft nor too sticky. Turn it out on to a floured surface and knead briefly. Leave to rest for half an hour.
For the paste, simply combine all the ingredients and whisk till smooth and well blended.
For the syrup, heat the sugar and water in a heavy-bottomed pan. Cook until the syrup reaches one-string consistency (this corresponds to about 215F on a candy thermometer) and then add the flavorings. Keep warm. While the syrup is cooking, heat the oil for frying.
Break of lime-sized balls of the dough and roll them on a lightly floured surface into 4" circles. Place a few dabs of the layering paste and spread it over the circle. Fold the circle into half and then quarters, repeating the process of layering. Roll the dough quarter-circle out into a larger triangle. Prick all over with a fork and then fry in the oil till golden brown. Remove with a slotted spoon and drop into the sugar syrup, turning once to coat. Dry on a wire rack that has been set over a plate. Repeat till the pastry is used up.
Collect all the leftover syrup from the plate and heat it once again till any crystals have dissolved. Working quickly, dip each pastry in the syrup again, and then remove to the wire rack to dry. Decorate with the pistachios and leave to dry. These pastries can be stored in an air tight tin when dry but are best eaten within 3 days of making.

Tuesday, October 26, 2010

Stuffed squash


Why do I have a recipe featuring summer squash in the middle of fall? You may well ask. Even though this is the season for acorns and butternuts, some of the farmers at my local farmers' market are from further south, and were selling the last of their summer squash. Of course I couldn't resist those cute little pattypans and rond de nice! They are perfect for stuffing. I love food that's served in individual portions, and you can eat more than one depending on how hungry you are!

Keeping the season in mind, though, I decided that the stuffing had to be a little more hearty than usual. If it were summer I would do a lighter one using the scooped out squash flesh, breadcrumbs, pine nuts and goat cheese; maybe liven the whole thing up with a drizzle of fresh tomato sauce. Instead, I settled for a stuffing of mejadra, a wonderful Middle Eastern dish of rice and lentils flavored with spices and plenty of fried onions. My go-to source for contemporary Mediterranean recipes is Yotam Ottolenghi, who writes a column called The New Vegetarian in the Guardian. He had posted a recipe for this a few weeks ago, which I had been keen to try, and this was the perfect opportunity. The only change I made was to pan-fry the onions instead of deep-frying them - it produces the same results if you have a good pan that will fit them in a single layer, and a little bit of patience. The onions can be left to cook on low heat and you can busy yourself doing other things.

I served the stuffed squash topped with a dollop of Greek yogurt sprinkled with some sumac. We all really enjoyed this dish - not too heavy, not too light, and the delicate flavor of the squash was a great counterpoint to the earthy lentils, sweet onions and warm spices. The bonus was I also got a small pot of soup made with the scooped out squash flesh - two dishes for the price of one!

Recipe: Mejadra-stuffed squash (Serves two, but can easily be scaled up)
1/2 recipe Ottolenghi's Mejadra
Four squashes suitable for stuffing (I used rond de nice and pattypan, but you can use a large zucchini, halved lengthwise, or acorn squash quarters or any thing else)
1 tbsp olive oil
Greek yogurt and sumac for serving (optional)
Preheat the oven to 300F (150C). Cut a thin slice from the bottom of the squashes to make them stand upright. Cut off the tops and carefully scoop out the flesh with a melon baller or a teaspoon, leaving a shell about 1/3" thick. Reserve the squash flesh for another use (I made soup) Sprinkle the insides with some salt and stand upside down to remove some of the excess liquid while you prepare the mejadra.
Pour about a tablespoon of olive oil into a glass or ceramic dish large enough to hold the squashes snugly. Stuff the squashes with the filling, taking care to not to pack it in so tightly as to split the squash shells. Bake in the preheated oven for about 45 minutes, or until the squash shell is pierced easily by a knife. Serve with Greek yogurt topped with a sprinkle of sumac and with extra mejadra on the side.

Friday, October 1, 2010

Tarte tatin, a fall favorite


Fall is officially in the air! I love this season, with its breezy days and cool nights; the beautiful palette of colors as leaves turn; fall greens such as kale and swiss chard; and the bewilidering array of knobbly pumpkins and squashes in the markets. I also love apples and pears, the quintessential fall fruit. Growing up in India, which is mostly tropical, I didn't get to sample much variety by way of these, so it was only since moving to the US that I experienced them in their full glory. I'd visit every stall in the Union Square Greenmarket, sampling each kind that the farmers were generous enough to offer, making my own tasting notes and discovering my favorites along the way.

I enjoy apples and pears in so many different ways - baked, poached, in salads, or simply eaten out of hand. Of course, my all-time favorite way to cook with them is to make an indulgent tarte tatin. This is one of my favorite desserts - apples or pears cooked in salted buttery caramel and baked under a flaky pastry crust. There are amusing stories about the origin of this French classic - some say a server once dropped a tart, and then went on to serve it in its upturned state. Others say someone forgot to line the tart pan with pastry before filling it with the fruit and decided to bake it on top of the fruit instead. While I can't vouch for the authenticity of either story, I can definitely attest to how delicious this tart is. It is one of those rare desserts you can put together with just five ingredients: fruit of choice, flour, butter, sugar and salt. After tweaking around with a few different recipes, I've formulated my own version. It's easy to do ahead, too; the dough circle and the caramel can both be stored in the refrigerator overnight, making this a good dessert for entertaining.

This is the perfect fall dessert. Traditionally, it's served au naturel, but even though the French may scoff at me, I certainly wouldn't say no to a scoop of vanilla ice cream or a dollop of creme fraiche alongside mine!

Recipe: Tarte tatin (Serves 6-8, depending on your fondness for this dessert!)

Crust:
1 1/4 cup flour
2 tbsp sugar
1/3 teaspoon salt
6 tablespoons cold unsalted butter, cubed
3-4 tablespoons ice water

Caramel:
1/3 cup sugar
2 tbsp butter (the French use salted, but I usually have only unsalted)
A good pinch of sea salt - I save my precious fleur de sel for use in sweet applications like this one. If using salted butter, reduce or omit this, depending on how salty you like your caramel.
Fruit:
As many apples or pears you need to fit your pan, which could be a cake pan or an ovenproof skillet 8-10" in diameter. Use a firm variety which holds its shape when cooked. The picture above is of a tart made with Bosc pears.

For the crust, dump the dry ingredients in the bowl of a food processor and pulse briefly. Add the butter and pulse till it is about the size of small peas. Add the ice water, a tablespoon at a time, and pulse till the dough just comes together. Turn it out on to a lightly floured surface and knead briefly. Flatten it into a disk, wrap in cling film and chill for half an hour. Once the dough is rested, roll it out on a lightly floured surface to a circle a little larger than your pan. Transfer to a parchment-lined baking sheet and chill. This makes sense to do ahead because the chilled circle of dough is very easy to transfer to the fruit.
Preheat the oven to 375F(190C)
Peel and core the fruit and cut into quarters. If not using them immediately, transfer to a bowl of water with a squeeze of lemon in it to prevent discoloration.
For the caramel, put the sugar with a tablespoon of water in your pan of choice, and place over medium heat. Once the sugar is melted and starts to boil, cook it for a few minutes, until it caramelizes and turns a deep amber color. Remove from the heat, add in the butter and salt and stir till incorporated. If your pan cannot be used on the stovetop, do this step in a saucepan and transfer the caramel to the pan.
Pat the fruit dry and arrange, rounded side down, on top of the caramel. Pack it in tightly to allow for shrinkage while baking. Place the dough circle on top of the fruit. The warmth of the pan will cause it to drape to the contours of the fruit. Bake the tart for about 45 minutes or until the top is a deep golden brown. Allow to cool briefly, then place a large plate on the top of your pan and flip the tart over. The juices can be poured off and reduced further to glaze the tart. Serve warm on its own or with vanilla ice cream or creme fraiche.

Sunday, September 12, 2010

Ottolenghi's Fried Cauliflower with Tahini


I will happily admit that I need a little bit of retail therapy once in a while. Except that my kind usually involves buying random food ingredients while browsing in markets, and then finding ways to use them later! Pomegranate molasses is one such ingredient I have in my pantry, bought when I had a muhammara craving last summer; and countless others, such as fried shallots (a welcome addition to anything from soups to curries) and shredded red peppers (merely because the long red strands look so attractive!). I also have a big bottle of tahini that I bought because it was on sale, and have been looking for ways to use up ever since.

Enter Ottolenghi's fried cauliflower with tahini recipe. It calls for pomegranate molasses and tahini, two of the items I am keen to use up, and besides, it sounded so delicious I had to try it. The only change I made was to saute the cauliflower and scallions instead of deep-frying them, and I don't think it affected the taste one bit.

This is a fabulous dish! I ate it with some bread and some red and yellow tomatoes dressed simply with olive oil and a squeeze of lemon. It made for a perfect summer lunch. The dressing is a wonderful medley of flavors, from nutty sesame to tart pomegranate molasses to fresh herbs and cool yogurt. It has become my current favorite - I've since used it in a greek-style salad with tomatoes, cucumbers and feta, as well as in a fried eggplant sandwich. Try it!

Recipe: Ottolenghi's Fried Cauliflower with Tahini

Sunday, August 15, 2010

Banana leaf parcels (Elai Adai)


I'm back from a wonderful trip to India and already suffering serious withdrawal symptoms from all the delicious food I enjoyed there! On any trip home, I make sure to load up on all the once-common, now-exotic fruits and vegetables that are hard to come by here in the US. Sapodilla (sapota), limetta (sathukudi), elephant yam (chenai), and tender coconut juice (elaneer) to name just a few.


Possibly the most exotic of these is the jack fruit (chakka), the largest tree-borne fruit in the world, sometimes weighing in at a massive 100 pounds! The fruit has a spiny inedible skin that encases bright yellow, highly perfumed fleshy pods. These taste like a cross between a pineapple and a banana. The pods contain large round seeds that are also edible.
In my native state of Kerala, jack fruit trees are found in every backyard and the plentiful fruit are used in myriad ways, both when raw and ripe. Most of these are rustic, homey dishes that you will never find in any restaurant! The flesh of the raw jack fruit has a meaty texture that makes it suitable for many vegetarian curries, some of which also include the boiled seeds that are an excellent source of protein. The ripe pulp is cooked with unrefined cane sugar (jaggery) to make a fruit preserve known as chakkavaratti. This fruit paste keeps very well in the freezer and is delicious by itself, or caramelized with fresh coconut. It is also used as a base for many kinds of snacks and desserts.

One of my favorite recipes using jack fruit is elai adai, a rice dumpling filled with sweet jack fruit paste and coconut. A thin batter made with ground rice is first spread on a banana leaf. Next, a spoonful of the filling is spread on one side of the batter. Now comes the tricky part: folding the leaf over so that the batter encloses the filling, while tucking in the sides so that it does not ooze out! The banana leaf parcels are then steamed over boiling water for 15-20 minutes, or until done. My sister turned out to be a dab hand at it, so I was able to click happily away as she deftly spread, filled, folded and stacked.


These dumplings make a great breakfast, snack or anytime treat - the moist, chewy and slightly salty rice covering provides a nice foil for the sweet, fruity filling. Try them with other sweet or savory fillings as well!

Recipe: Elai Adai (Banana leaf parcels)
Makes about 15 parcels, approximately 4"X2"
1 cup raw rice
Salt to taste
A few teaspoons all-purpose flour
Filling of choice: The pictures above show the traditional jack fruit paste caramelized with coconut and jaggery. Other ideas include savory curried vegetables, or grated coconut caramelized with brown sugar or jaggery.

Soak the rice in water for at least two hours. Grind to a fine paste, adding more water to thin the batter as necessary. Season with salt and mix in a few teaspoons of al-purpose flour to make the batter more spreadable.
To fill and shape:
Spread a couple of tablespoons of the batter evenly in a circle on a banana leaf or parchment paper. Spoon a little of the filling on one half of the circle. Working quickly, fold the leaf over and tuck the sides in so that the filling is enclosed completely. Repeat with remaining batter and filling. Stack the leaf parcels in a steamer and cook over boiling water till firm.

Friday, July 16, 2010

Mad about mangoes!

Langra, banganapalle and chausa mangoes
I'm back in Madras, enjoying the company of my family and plenty of delicious home-cooked food! It is funny how only food from my mother's kitchen seems to merit that description, even though I can safely say I have a larger culinary repertoire than hers. Food is always a huge part of any visit home - I always have a long list of foodie experiences to catch up on that I don't have access to in the US.
India is home to the best mangoes in the world, hands down. There are literally hundreds of cultivars in the different growing regions, with eager mango growers developing new and delicious hybrids each year. Alphonso and Pairi mangoes from the west, Chausa and Dashehri from the north, Langra and Himsagar from the east, and Mulgoa and Banganapalle from the south to name just a few. I was doubly excited about this trip home because it meant I could catch the tail end of the mango season here in Madras. Growing up, this was the time of year to look forward to, a time of holidays from school and long lazy days, a precious few months when I could eat my fill of ripe, juicy golden goodness, and savor the memories for the rest of the year.

I arrived in Madras thinking I'd get two weeks of mango eating at the most, since the season ends in mid-July. Happily for me, though, a friend of my father's sent us a box each of two cultivars from other growing regions in India, where the season ends later! This makes for more mango madness. I thought it would be fun to share my tasting notes of the three different types in the picture above.

The langra mango from East India has green skin even when ripe. The fruits are small, weighing less than half a pound each.The flesh is a vivid orange yellow and fibrous in texture, somewhat like a plum. A peppery top-note yields to a tropical pineapple-banana flavor profile.

The chausa mango from North India is small, elongated in shape and has pale yellow skin. The flesh is a medium yellow-orange and buttery-firm in texture, like an avocado. It is perfumed, with hints of honey, lemongrass and vanilla.

The banganapalle mango from South India is large, with some specimens weighing in at over two pounds. The skin is thin and edible, a speckled pale yellow. The flesh is a bright yellow and impossible to eat without juice running down your chin! It has a highly perfumed, almost floral bouquet, with notes of rose, litchi and peach.
A big shout-out to my 6-year-old niece who assisted me on the photo shoot!


Sunday, June 27, 2010

Daring Bakers' Challenge #7: Chocoholic heaven!


The June 2010 Daring Bakers’ challenge was hosted by Dawn of Doable and Delicious. Dawn challenged the Daring Bakers to make Chocolate Pavlovas and Chocolate Mascarpone Mousse. The challenge recipe is based on a recipe from the book Chocolate Epiphany by Francois Payard.

I took some liberties with the challenge recipe since I have never been a huge fan of plain meringue. I do, however, love all nut-based versions, so I picked Francois Payard's dacquoise recipe (also from Chocolate Epiphany) to use as the base, substituting hazelnuts for almonds. Thanks to a previous challenge, I now know how to make my own mascarpone, so I'm never spending $10 on a teeny tub again! Of course, that meant adding another step to the many involved ... ... I also made three different chocolate mascarpone mousses to top the dacquoises with, using dark, milk and white chocolate. The dessert brought tiramisu to mind, so I dipped the bases in rum-spiked coffee to keep with that theme.

The final component of the dessert was a Sambuca-spiked mascarpone cream to drizzle on top, which I swapped for a plain crème anglaise instead, since I felt the dessert was rich enough as is. I bet it would taste great with some juicy summer fruit, so I've saved the recipe (and some mascarpone!) for later. Overall, it tasted wonderful, and looked pretty as well. Definitely a dessert to please all the chocolate lovers out there.

This was a fun challenge, even though making it in the peak of summer meant that my mousses started melting before I could finish piping them. Nothing that a short spell in the fridge couldn't fix, though! Looking forward to the next one.

Wednesday, May 26, 2010

A visit to a farm and some shortbread


Guernica peppers
Photo by Tammy Gordon

Last Sunday, I went with the DC Food Bloggers to Eco Farms, an organic, bio-intensive farm in Lanham, Maryland. Eco Farms is a family-run operation that's been proudly serving up fresh local produce to some of the best restaurants in the region. I have always been keen to learn more about farming, and to do this with a bunch of food bloggers - Elyssa, Mary, Olga, Tammy, Luke & Joe - made for some great company as well!


Our tasks for Sunday were to weed lettuces, prepare some beds for planting, and to transplant some tiny seedlings out in the beds. One of the fun things I learnt was how to use the U-bar, which is essentially a pitchfork on steroids :) I will admit to having only mixed success with it, though. I found that being tiny is an advantage when performing some farm tasks, like hoeing, raking and planting, since most of the others were complaining of backaches, but working the U-bar, alas, is not one of them!

We planted beets, which have the most adorable red-tinged roots; guernica peppers, which I'd never heard of, but am now keen to try; epazote, which, we discovered, smells like lead pencils when fresh (Laura took one sniff and pronounced that it reminded her of elementary school!); and four different types of basil. We had a surprise visitor, too, when a snapping turtle wandered in from the nearby woods! She is a regular visitor to the farm, but that was her first appearance of this year. She sat patiently on the gravel while we oohed and aahed and examined her from every angle; then, she disappeared into the woods as silently as she had arrived.
Snapping turtle
Photo by Tammy Gordon
Pretty soon, we were done for the day, and headed back into the farmhouse where Laura and Mike had laid out a fabulous spread for us. Grilled vegetables, salad greens from the farm, and couscous made for a healthy and delicious meal, accompanied by zesty dips and condiments like Laura's eggplant-red pepper hummus and Mike's stinging nettle pesto. I took along some pecan shortbread for a nutty, buttery sweet end to the meal. Recipe posted below!


A big thank you to Mike and his faithful crew at Eco Farms for a wonderful experience, and to Tammy for generously sharing the above photographs. Looking forward to the next time!

Recipe: Brown Sugar Pecan Shortbread (Makes about 3 dozen cookies)
Adapted from Ready for Dessert by David Lebovitz
3/4 cup (1 1/2 sticks) unsalted butter, at room temperature
1/2 cup light brown sugar
1 1/2 cups all-purpose flour (I replaced half the quantity with white whole wheat flour. My "healthy" version!)
1/4 tsp salt
3/4 cup pecans, toasted and coarsely chopped
1 tsp dark rum (I bet bourbon would be great too, but this is optional)
1/2 tsp vanilla extract
Fleur de sel (optional)
Stir the flour(s) and salt together in a small bowl. Cream the butter and sugar together till fully combined. Mix in the vanilla and rum, if using, then beat in the flour till thoroughly incorporated. Stir in the pecans. On a floured piece of plastic wrap, shape the dough into a round or rectangular log about 9 inches long. I used a dough scraper pressed against the sides to approximate right angles. Wrap in plastic wrap and refrigerate at least for an hour or even overnight.
Preheat the oven to 350F(180C). Using a sharp knife, slice the dough log crosswise about 1/4" thick, spacing them an inch apart on parchment-lined baking sheets. If using fleur de sel, sprinkle a few grains on each cookie, pressing them in gently. Bake for about 15 minutes, rotating the sheets halfway through, until a deep golden brown. Allow to cool on the baking sheet till firm enough to handle, then remove to a wire rack to finish cooling completely. Store in an airtight container.

Tuesday, April 27, 2010

Daring Bakers' Challenge #6: Sticky Toffee Puddings


The April 2010 Daring Bakers’ challenge was hosted by Esther of The Lilac Kitchen. She challenged everyone to make a traditional British pudding using, if possible, a very traditional British ingredient: suet.

I grew up in India reading the very British books of Enid Blyton, and their puddings always sounded so exotic and delicious to me - Treacle sponge, Spotted Dick, you name it. I was excited to try my hand at one for the first time. Being vegetarian, though, I wasn't wild at the idea of using suet, even a veggie version, so I stuck to a butter-based version. I'm in the camp that firmly believes everything tastes better with butter!

I based my pudding recipe on one for Sticky Toffee Puddings from David Lebovitz's new book, Ready for Dessert. Yes he's American, but I've always had great results with his recipes. I used a bit more dates than he calls for, so that the puds would be nice and sticky, and reduced the amount of sugar. His version also uses kumquats for a tangy contrast to the sweet pudding, but I couldn't find any, so I made the recipe without them. Instead, I added some chopped crystallized ginger, and a bit of ground ginger, for some spicy undertones. I steamed mine in individual cups, and then poured a generous ladle of toffee sauce over the top and broiled them for five minutes.

I have a feeling the suet crust puddings may have been more of a challenge to make, but these were so delicious I'm not about to complain! This dessert really begs to be eaten warm, and it was just perfect for a chilly, rainy spring day. Gooey caramelized toffee with moist, buttery cake - what's not to like? The dates melt into the background, allowing the spicy zing of the ginger to shine through. The broiling really boosts the caramelized flavor as well. I would love to experiment with adding a boozy flavor, such as bourbon or cognac. This would be fabulous with some vanilla ice cream on the side, too, but sadly, I didn't have any on hand. Now that's an excuse to make these again!

Recipe: Sticky Toffee Puddings (Serves 6)
Adapted from Ready for Dessert by David Lebovitz

1/2 cup finely chopped dates
1/2 cup water
3 tbsp finely chopped crystallized ginger
1/2 tsp baking soda
1/2 cup + 3 tbsp all-purpose flour
1/4 tsp salt
1/2 tsp baking powder
1/2 tsp ground ginger
2 tbsp unsalted butter, at room temperature
1/4 cup + 1 tbsp sugar
1 large egg, at room temperature
1/2 tsp vanilla extract
Sauce:
1 cup half-and-half (or heavy cream)
1/4 cup dark brown sugar
1 1/2 tbsp molasses
Big pinch salt
Prepare 6 individual cups by oiling them lightly and get your steaming apparatus ready. You can also bake these puddings, in which case you could use a 6-cup muffin tin and preheat the oven to 350F(190C).
Combine the dates and water in a small saucepan and bring to a boil. Turn off the heat, add the baking soda and the chopped ginger and set aside for ten minutes. Mash up the mixture till it's almost fully smooth.
For the sauce, combine all the ingredients in a small saucepan and bring to a boil. Lower the heat and simmer until thickened, about 5 minutes. Place about a tablespoon of sauce in each cup.
For the puddings, sift all the dry ingredients together. Cream the butter and sugar until light and fluffy, then beat in the egg and vanilla. Gently stir in half the dry ingredients, the date mixture, and then the rest of the dry ingredients. Divide the batter among the cups, secure the top with two layers of foil, and steam over boiling water until fully set, about 30 minutes. While the puddings are steaming, preheat the broiler with the oven rack set close to the top.
Invert the puddings on a baking sheet, pour a generous helping of the toffee sauce on top and broil for about 5 minutes, until the tops of the puddings and the edges of the sauce are dark and caramelized. Allow to cool briefly and serve warm with extra sauce and a sprinkling of extra chopped crystallized ginger.
If not serving immediately, allow the puddings to cool and then cover with foil. When ready to serve, reheat in a moderate oven (300F) and proceed with the broiling as above.

Saturday, March 27, 2010

Daring Bakers' Challenge #5: Orange tian

The 2010 March Daring Baker’s challenge was hosted by Jennifer of Chocolate Shavings. She chose Orange Tian as the challenge for this month, a dessert based on a recipe from Alain Ducasse’s Cooking School in Paris.
I had never heard of a tian before, but it looked light and delicious, so I was keen to give it a try. The recipe required a few different components: Pâte sablée pastry circles, orange marmalade, stabilized whipped cream (I flavored mine with Grand Marnier) and orange segments for the top, all finished off with a drizzle of orange caramel sauce. To make it easy for myself (and to make a smaller portion) I used leftover pâte sablée, so I just had to make the other components. However I also had some lemon cream leftover from this tart, so I wanted to make a version with that as well, simply because it's the most delicious lemon cream ever. So I ended up making lemon and orange marmalades, one for each.
This dessert is quite easy to do, and is pretty as a picture, but a bit messy to eat. Even though the cream stands up to the weight of the fruit quite well, it's difficult to cut with a spoon without squishing all the cream outwards.

The lemon cream was not really intended for this use, as you can see from the picture below - but it does taste really good.

And finally, the cook got to enjoy this bite-size tian sandwich, made with pastry scraps!

Sunday, March 21, 2010

Pierre Hermé's extraordinary lemon tart


Spring is finally here! Flowers are blooming and temperatures are climbing - and not a moment too soon! So when I was wondering what dessert to take to a party this weekend, I knew I had to make something light, cool and refreshing, to herald the warmer weather ahead.
Pierre Hermé, pastry chef par excellence, has invented a unique lemon cream that seems to have wowed all the pastry lovers in the blogosphere. The filling is made using the same ingredients - eggs, butter, lemon juice and zest, sugar - as you would find in lemon curd, the custard filling normally used in lemon tarts. Only, in his version, the butter is not melted into the lemon custard. Instead, you cool the custard for ten minutes and then emulsify the butter, by adding it bit by bit while blending the mixture at high speed. The result: a light, silky cream, which dissolves into your mouth with a burst of citrusy flavor. It doesn't have the vivid yellow color of traditional lemon curd, but the texture is far superior. I think this technique would work well with any citrus fruit, and I am also wondering how a mango version would turn out.

Recipe: Pierre Hermé's Lemon Cream Tart
Dorie Greenspan's tips for how to get it right

I used a pâte sucrée made with a bit of ground almonds added to the flour for the tart shell. The only changes I made to the filling were: I didn't use a thermometer (I don't have one) and I used only one stick of butter. The original amount called for seemed like the product would be too rich for me. I blended the mixture a bit longer to compensate! Everyone seemed to like it, so I plan to stick with the lesser quantity.

Saturday, February 27, 2010

Daring Bakers Challenge #4 - Just the pick-me-up I needed!

The February 2010 Daring Bakers’ challenge was hosted by Aparna of My Diverse Kitchen and Deeba of Passionate About Baking. They chose Tiramisu as the challenge for the month. Their challenge recipe is based on recipes from The Washington Post, Cordon Bleu at Home and Baking Obsession.

This has been a hectic month - I just realized I haven't had the time to get around to updating my blog in between challenges! However, I was determined to participate, since I love tiramisu (Italian for pick-me-up) and had never made one before. The challenge involved quite a few steps. The mascarpone cheese and savoiardi (ladyfinger) cookies had to be made from scratch, and the cream layer had three other parts, zabaglione, pastry cream and whipped cream.


I initially had my doubts about the mascarpone, because it's made in exactly the same way as home-made ricotta or paneer, using cream instead of milk. However, you don't get the same dramatic curdling of milk once the lemon juice is added. It simply thickens slightly, like a custard, and the time spent in the refrigerator is what produces the finished product. It was really good, too, luscious and creamy! I'm planning to make some more during berry season.

The ladyfingers came together very easily, and if the process was a bit messy it's only because of my lack of skill with a piping bag! I figured no one would notice what they looked like once they were cleverly concealed between layers of tiramisu filling :) The leftovers were great with a cup of coffee too.


The other parts of the filling were zabaglione and pastry cream, which got mixed in with the mascarpone, and then the whipped cream got folded into it all. These were straightforward, if a little mixing-bowl-intensive ;)

As I mulled over flavor ideas, I knew I had to make a traditional one, since its mix of flavors is so perfect. But since this is a Daring Bakers' Challenge, I decided to do a mango tiramisu as well. I used the same cream filling, but dipped the ladyfingers in alphonso mango pulp diluted with rum. For the top, I swapped the traditional dusting of cocoa with a thin layer of mango puree set with gelatin.


The traditional one was delicious, and the mango one was surprisingly good too! I wouldn't attempt it with anything but alphonso mangoes, though, since I have never come across any other mango whose flavor profile is strong enough not to get buried under the weight of all the rich dairy ingredients. Freshly pureed ones if you're lucky enough to find them, otherwise the canned pulp (I use Ratna brand, available at Indian grocery stores) works fine.

This was a fun challenge! I'm pretty sure I would never have attempted making ladyfingers or mascarpone if it hadn't been for this. Looking forward to the next one!

Recipes:
Home-made Mascarpone Cheese
Savoiardi (Ladyfinger) biscuits
Carminantonio's Tiramisu

Wednesday, January 27, 2010

Daring Bakers' Challenge #3 : Rum-pecan dulce de leche nanaimo bars


January 2010 Daring Bakers’ challenge was hosted by Lauren of Celiac Teen. Lauren chose Gluten-Free Graham Wafers and Nanaimo Bars as the challenge for the month. The sources she based her recipe on are 101 Cookbooks and www.nanaimo.ca.

I'll admit I'd never heard of nanaimo bars in my life. But hey, that's what being a Daring Baker is all about! I did change things up a bit, adding a generous shot of rum into the base layer, using only pecans and graham cracker crumbs (I dislike the coconut-chocolate combination), and swapping homemade dulce de leche for the buttercream. Since everyone on the forum had been commenting on how rich these were, I also cut them into bite-size pieces, more like candies than bars.

I think I crushed my graham crackers too fine, because I could barely taste them in the finished product. The verdict: tasty (with chocolate, rum, pecans, caramel - what's not to like?), and a novelty, but I may not make these again.


Friday, January 22, 2010

Macaron madness


Ever since my failed attempt at making macarons for a Daring Bakers' Challenge a few months ago, I've been torn: do I try my luck with these tricky devils again, or do I relegate them to the list of only-to-be-bought-at-patisserie items? The decision was taken out of my hands when a batch of crème anglaise I made left me with a whole lot of egg whites. So, armed with Helen's guide, Demystifying Macarons, I soldiered on bravely. Like all of her recipes, this one seemed approachable for a novice, and as always, is written with a generous dose of humor and common sense.

I was pretty skeptical about whether I would pull it off, so I opted to make plain almond macarons. No fancy flavors or colors just yet, imagine if I were saddled with, say, a bunch of collapsed and sticky green cookies! I probably wouldn't even be tempted to scrape them off the sheet to snack on. Anyway. Just as I was subjecting the meringue to Helen's grandmother's anti-gravity test, the husband wandered into the kitchen. His shock at seeing me calmly turn a full bowl upside down quickly gave way to astonishment when the contents stayed put inside! The batter was fairly quick and easy to put together, and once I'd piped the shells out began the agonizing wait to see how they would turn out. The piped shells are supposed to dry out for an hour before baking to help them develop the distinctive "foot" around the base.

I popped them into the oven, set a timer, and refused to peek until it went off. Et voila! The shells had risen nicely, each with the cute little foot, or pied, at the base. Once they cooled, I sandwiched them together with chocolate ganache in two flavors - one made with dark chocolate, and the other with Toblerone, from a pack of minis I had sitting around.


The macarons weren't perfect - in my trepidation of squeezing all the air out of the meringue, I probably didn't fold my batter enough, so they were a bit more airy than they're supposed to be. Still, I'm very pleased with my elegant and delicious confections - I will be making these again, and the next time I'll be brave enough to try other flavors. Thanks Helen!